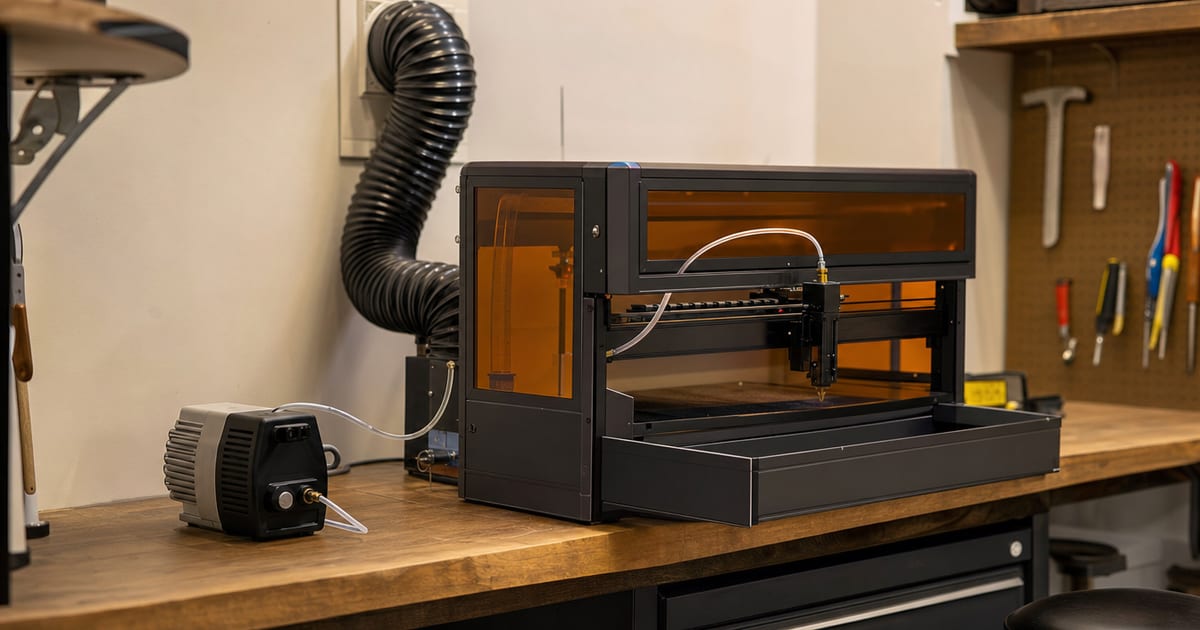
I can still smell that first weekend. I’d set my new diode up on the kitchen table, cracked a window, and started a job — and within minutes the room was thick with acrylic fumes. It stung my eyes, caught in my throat, and I had to throw the doors open and clear out. That was the day air assist and ventilation stopped being “accessories I’d get to later” and became, in my head, part of the machine itself. I tell every new maker the same thing now: bad ventilation ruins more first projects — and more lungs — than bad optics do.
Two different jobs people lump together
“Airflow” actually covers two separate things, and you need both.
- Air assist is a stream of air blown across the exact point where the beam meets the material. It clears smoke out of the beam path so the laser keeps cutting cleanly, and it cools the cut to reduce scorching and flare-ups. It makes your cuts better and safer.
- Fume extraction / ventilation pulls the smoke and fine particles away from the work and out of your breathing space. This is the part that protects your lungs and your home.
Air assist is not a substitute for extraction, and extraction is not a substitute for air assist. They solve different problems.
Why this is a safety line, not a preference
Laser smoke from common materials — acrylic, leather, MDF — is genuinely harmful to breathe. This isn’t me being precious; it’s why every serious setup ducts its exhaust outside rather than just stirring the air around indoors. And some materials are flatly off-limits: never laser PVC or vinyl, because they release toxic gas that no hobby extractor is built to make safe.
The other non-negotiable is the fire watch. Air assist reduces flare-ups, but a laser is still a focused beam on flammable material. Never leave a running laser unattended. I’ve heard too many stories that start with “I just stepped out for a minute.”
How I set mine up
I’ve put the practical sequence in the steps above, but the short version is: air at the nozzle, work enclosed, smoke ducted outside, no toxic materials, and a human in the room the whole time. My garage now has a proper exhaust fan ducted through the wall to the outside, and I genuinely don’t run a job without it. The difference in cut quality from air assist alone surprised me — cleaner edges, far less scorching — but the real win is that I’m not breathing my own projects anymore.
What air assist actually does to a cut
It took me a while to believe how much air assist changes the quality of a cut, not just the safety of it. When the beam hits material, it produces smoke and a little plume of vaporised material right at the cut point. Without air assist, that plume sits in the beam path and partly blocks the laser — so the energy reaching your material drops, the cut gets shallower, and the smoke settles back onto the surface as scorch and soot. With a steady stream of air blowing it away, the beam reaches clean material every moment, the cut goes deeper per pass, and the edges come out far cleaner. On wood the difference is dramatic: char and brown halos around engraving largely disappear. On acrylic, air assist helps keep flame-ups from marring the edge. I genuinely get better-looking work and faster cuts with it on — it’s one of the rare upgrades that helps in every direction at once.
Pump vs compressor for air assist
When you go to set up air assist, you’ll find two common approaches. A small air-assist pump (an aquarium-style or dedicated diaphragm pump) is cheap, quiet enough, and plenty for engraving and light cutting. A proper air compressor delivers much higher pressure, which matters when you’re cutting thicker stock and want to really blast the cut clean — but it’s louder and pricier. For most hobbyists starting out, a decent pump is the sensible first buy; you can step up to a compressor later if your cutting demands it. Either way, the point is to have some air moving across the cut, not to leave the nozzle dry.
Don’t skimp here first
If your budget is tight, the temptation is to spend it all on the machine and “add ventilation later.” I’d flip that. A modest laser with proper airflow will make better work, more safely, than a powerful one choking a closed room. Air assist and a vented extractor are the first things I’d put in the cart after the machine itself. I’ve watched makers spend up to a bigger laser and then run it dry and unventilated, and their results were worse than a smaller machine set up properly — plus they were breathing smoke they shouldn’t have been. Power is the part of the budget you can compromise on; airflow isn’t.
I rounded up the airflow kit — air assist, enclosures and fume extraction — alongside the rest of the setup in the best laser engraver accessories including air assist and fume extraction guide.
This is general safety guidance from my own experience, not a substitute for your machine’s manual. Always follow the manufacturer’s instructions, duct extraction outside, never laser PVC/vinyl, and never leave a running laser unattended.